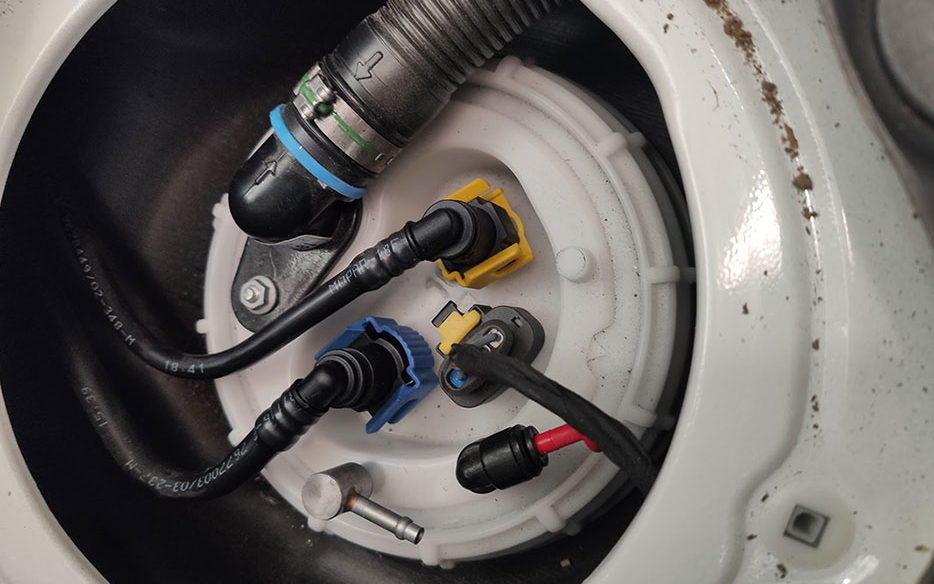
For most modern vehicles the fuel pump is in the fuel tank and the fuel line is pressurised. This means you cannot just cut into the fuel line and insert a T piece, you need to install a separate fuel pickup. Generally speaking if your engine has a modern common rail diesel engine, you cannot cut into your fuel line. If you have an older mechanically injected engine you can use a T piece in the fuel line. There are many different fuel tank setups from different manufacturers, we have captured a few setup options and described them below.
We rely on our own installation experience and customer feedback to keep improving this page – if you find a fuel tank setup that is substantially different to any here – please send us photos of your fuel pickup setup so we can add them to this page to help others.
Fiats
Remove the cover over the fuel tank between the driver and passenger seats. This is normally under the rubber floor mat, is round and is secured with 3 screws.
Fiat with connection point (late model)
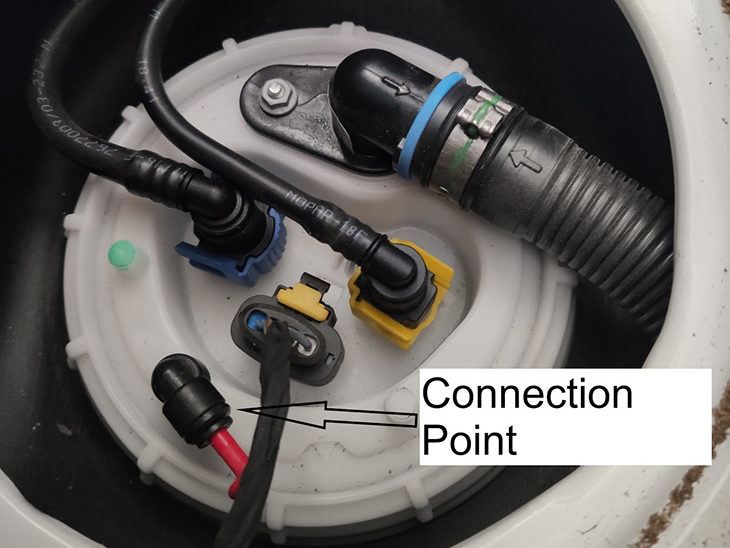
Remove the red plastic plug from the connection point and gently insert 5mm OD diesel heater fuel line. The line will self seal and lock into the connection point.
Vans with no connection point

Ensure that the green nipple has sufficient clearance around it to be able to screw in the fuel straw. It may be necessary to remove the fuel delivery or return lines to provide clearance for the straw to screw in.
Drill a 2mm pilot hole in the middle of the green nipple on the top of the tank.
Using the correct size drill bit, drill and tap a M6 thread into the nipple. The wall thickness will be very low once the thread is in place so this must be done carefully. Always coat the drill bit and tap with grease to minimise swarf dropping into the tank. It is also recommended to use a spiral flute tap as this will tend to drop less swarf.
Once the hole is completed insert the fuel straw until it hits the bottom of the tank, a bit of moving round to wiggle it past the fuel sender may be required.
The fuel straw will be too long. Measure the extra length plus 20mm and then cut the fuel straw to length, so it ends up 20mm above the bottom of the tank. Deburr the cut and blow any swarf out of the straw with compressed air.
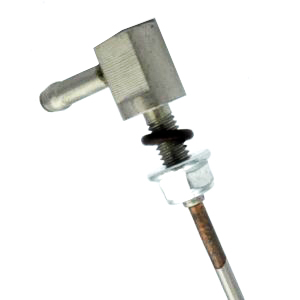
Screw in the fuel straw gently tightening it against the supplied o’ring. Do not overtighten.
Mercedes Sprinter
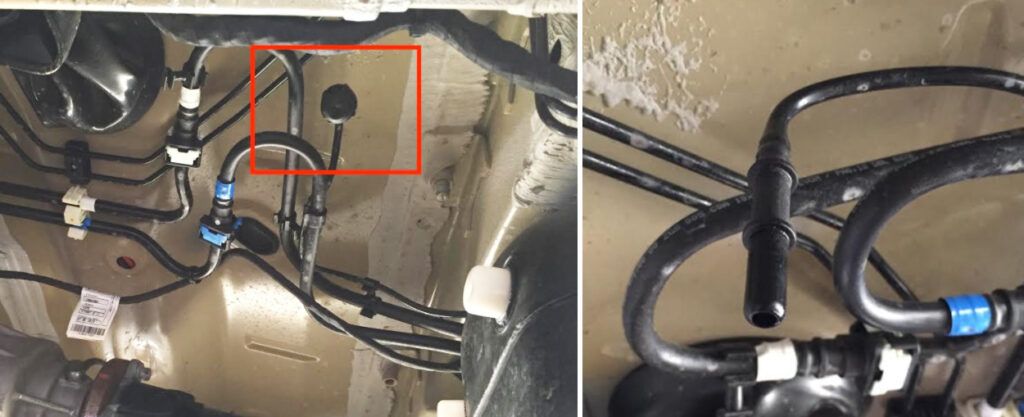
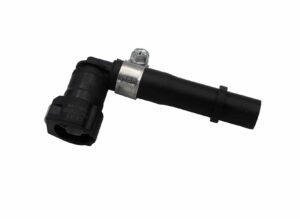
Late model Mercedes can have the option of an auxiliary fuel take off point. If this is present then it can be connected to via a specific connection rubber which Dieselheat can supply.
If your sprinter does not have an auxiliary pickup, see these pictures below of an auxiliary pickup installed in a late model sprinter. Instructions on how to install this pickup are further down this page.


Renault Master
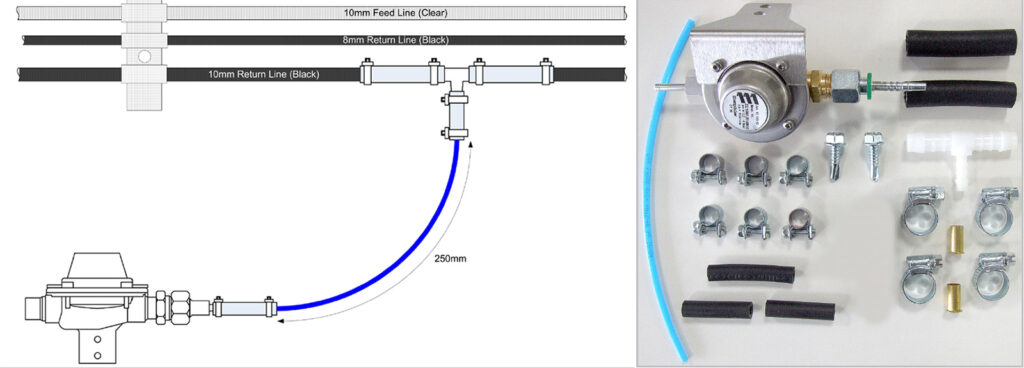
Renault master with a thick return fuel line can use an 8mm fuel line T piece and pressure reducing valve which is solid as a specific kit by Dieselheat to tap into the return fuel line. This avoids the need to remove the vehicle fuel tank.
VW Transporter T4 Approx 1990 to 2003
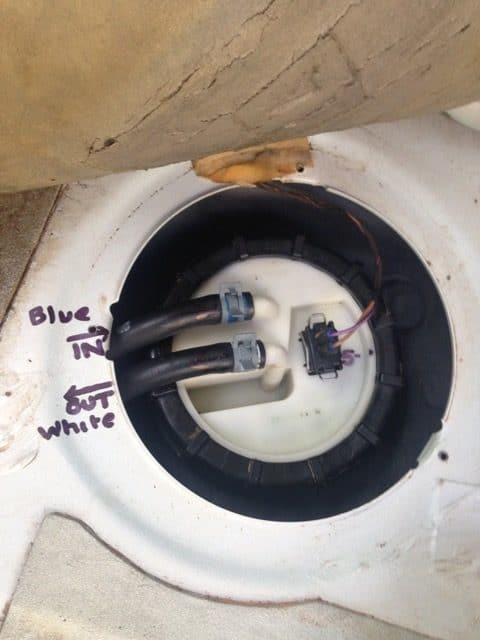
Most T4s do not have an in tank pump, but some later ones may have. Because there is a bit of uncertainty, you need to check.
The top of the fuel tank is accessible in the T4 by removing the passenger seat. Lift the rubber matting…some glued areas need a knife but slowly lifting causes no damage. Remove the plastic handbrake cover to facilitate the matting rollback. Remove the cover plate to expose the top of the diesel tank.
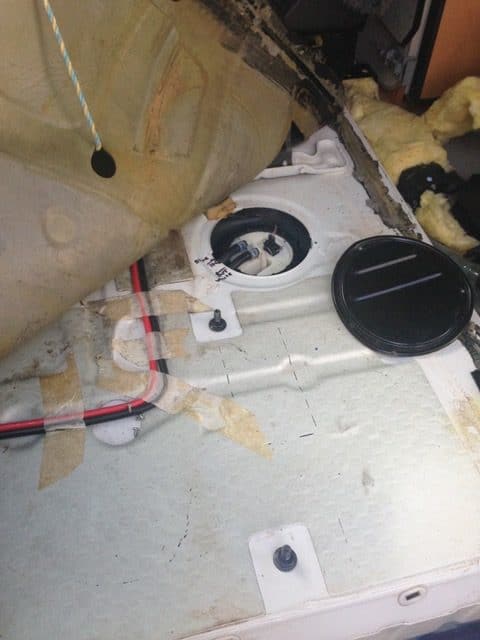
This tank assembly has only 2 wires for the fuel gauge sender, so in this case a T piece can be used in the fuel line from the tank to the engine or a separate pickup can be installed. If there are more than 2 wires, it is likely that they are for a fuel pump and so a separate pickup must be installed.
Volkswagen T5 onwards, Mercedes Sprinter and Others (installing a pickup)
If no specific connection point is present then the fuel tank must be removed from the vehicle. This is best done by a mechanic using a hoist and transmission lifter to support the tank.
Once the tank is out of the vehicle remove the sender unit. Look for a flat surface on the sender unit which has space underneath for the fuel straw. Try and find a place that is flat on the inside and outside (no ribs in the plastic) so the nut sits squarely on the back as well.
Drill a 6mm hole in the sender unit and insert the fuel straw with the o’ring above the plastic. Measure the required length of the straw and cut so it will be 20mm above the floor of the tank. Deburr the cut and blow any swarf out of the straw with compressed air.
Take note that some sender units have a spring loaded base and it will be lower than the floor of the tank (the springs compress when it is installed)
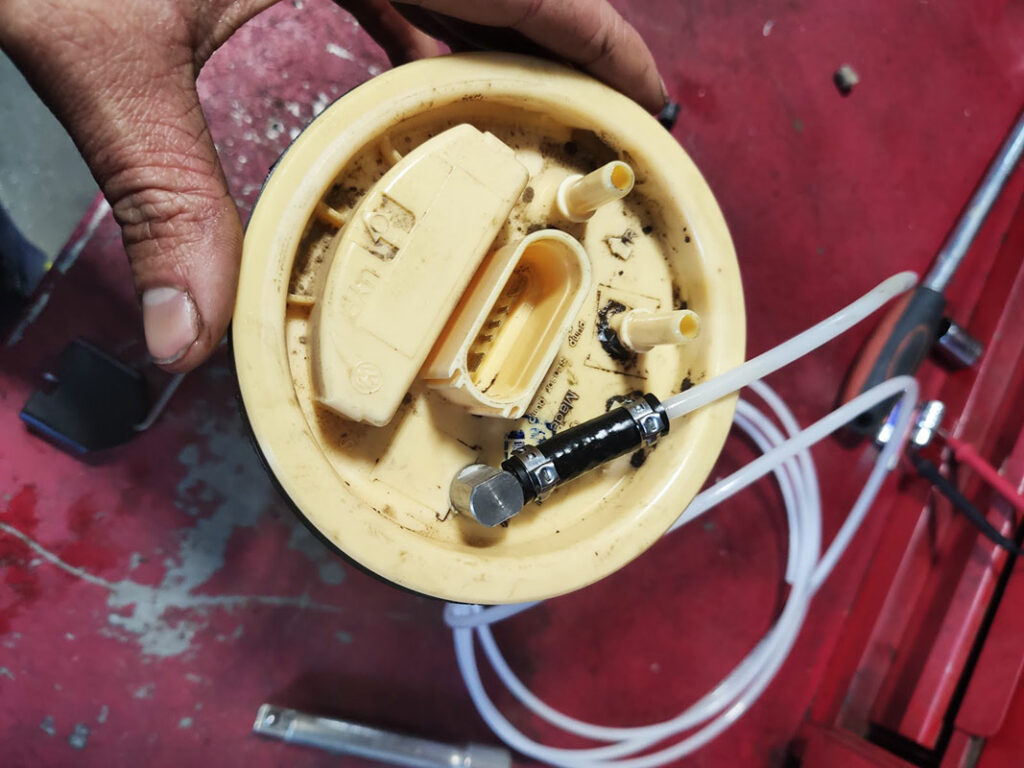
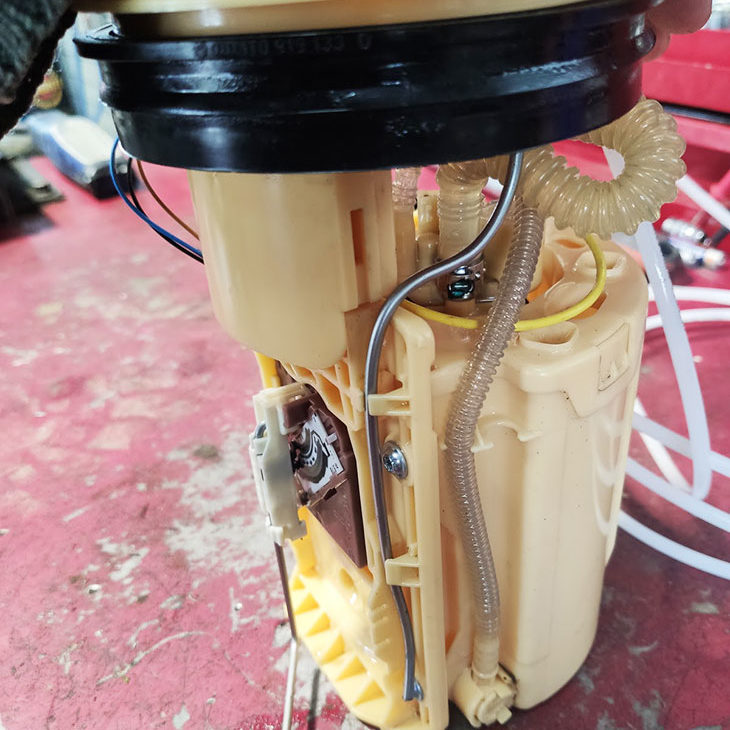
Do up the nut on the back side making sure it is tight.
Shape the Fuel straw to ensure it does not interfere with the fuel tank sender unit, recheck the length when re-installing the sender unit.

